Our FULL DIY bathroom remodel. We redid everything from the plumbing and walls to totally revamping the look and adding lots of bathroom storage.
Bathroom Remodel Reveal
I feel like I should actually titled this post How NOT to Remodel Your Bathroom. You see, we live in a very old farmhouse that we are slowly updating, mostly DIY. Our first update was to give our kitchen a face-lift by painting the cabinets (they were sea foam green and red when we moved in! Ah!) and we fixed the plaster and painted our living room.
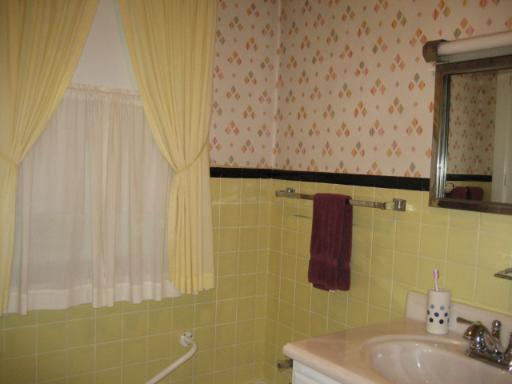
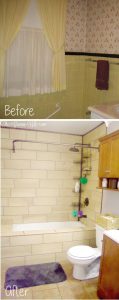
Now feeling confident in our DIY fixing-up abilities, we decided our next task was to tackle our horribly out-dated bathroom. I do mean horrible. It had pink wall paper with poo yellow (maybe green?) and black tile. NO shower and little storage, which is a problem with a large-ish family of five. Not to mention the floors which, no matter how hard you scrubbed on them, always looked dirty. So yes. We really, really needed to update our bathroom. From top to bottom.
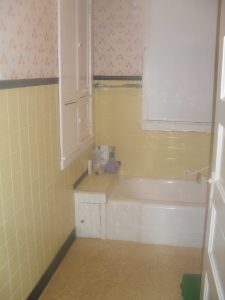
We decided we were going to gut the whole thing. Tear out the plaster, the old and stained cast iron tub, and even re-do the electric and plumbing. We could pull it off, right?!
Well, we did pull it off, but not without our fair share of trials. I'll share our biggest issue because it's mildly humorous, and then I'll show you our brand new bathroom!
The plumbing. It was supposed to be a simple job. We were just going to replace the old plumbing lines with PVC, switch the toilet and vanity location and call it a day. Sadly though, when Mr. Gracious went to replace the main line in the basement, the whole pipe cracked off, all the way to the floor. Enter jackhammers and cement and a whole extra pack of expenses that we hadn't planned for. We had to dig through our basement floor with the jackhammer and replace the pipes all the way under the ground. It was such a big mess!
But never fear because it got put back together and it was a blessing in disguise because we were able to install a new bathroom in the basement, which came in handy with our main floor bathroom out of commission during the Summer!
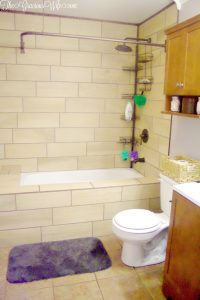
So on to the big event! Here's our finished product!
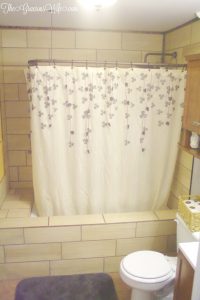
- This is our our Ivory, Gray, and Purple Shower Curtain
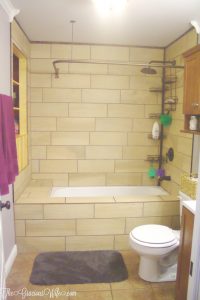
Mr. Gracious tiled the whole bathroom by himself. Didn't he do a good job?! (Okay, well let's be honest... He did most everything... I just bought a bunch of stuff and told him to put it in there...)
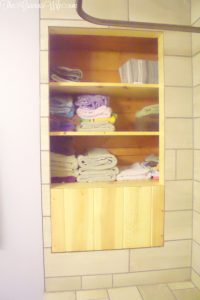
Mr. Gracious also redid the built-in linen closet. It used to be blue in there. We're not sure why since the bathroom was yellow(ish) and pink. But he stained all the wood, made the doors to the laundry chute, and literally rebuilt the whole thing. You also might notice our assorted towels in elegant patterns such as Sofia the First and Teenage Mutant Ninja Turtles.
- Click HERE
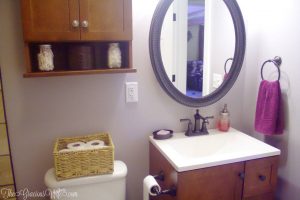
to view our large Rubbed Bronze Mirror Medicine Cabinet
When we redid the plumbing we actually switched the location of the toilet and the sink because the door opened toward the toilet, so I got hit quite frequently when the tots were barging in on me. It turned out not to matter all that much anyway because when we got a new door, we decided it would make much better sense to have it swing towards the other wall (which has nothing on it!).
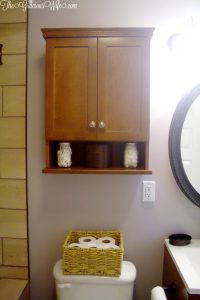
The over-the-john cabinet is by far one of my favorite additions to the bathroom. I love the storage! And we need all the storage we can get with 3 kids.
- Click HERE
to see top rated over-the-john cabinets.
We decided to go with rubbed bronze fixture and accents throughout the bathroom, partially because it's my favorite and Mr. Gracious hates telling me no, and partially because it matches the fixtures, hardware, and knobs throughout the rest of the house (some of which is new and some of which is literally bronze (maybe brass? I don't know?) that has been "rubbed" from use over the past 100 years).
- Click HERE
to see our rubbed bronze Shower Head and Tub Set
- Click HERE
- (And HERE is a sink faucet similar to ours
that matches the above shower head)
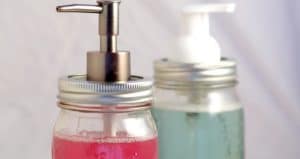
And you might also notice my Mason Jar Soap Pump, which you can find the tutorial for HERE.
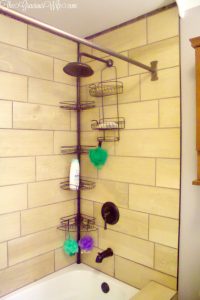
I insisted on these rubbed bronze bathroom caddies. I'm not sure WHY we have so many bath products, but I was tired of them laying everywhere, and also tired of the kids getting ahold of them and smearing soap everywhere...
- This is our Corner Caddy
- This is our Over-the-Showerhead Caddy
- Click HERE
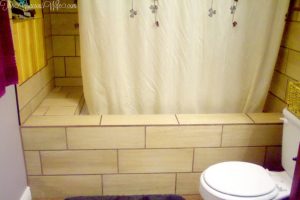
The really amazing part, to me anyway, is that this is NOT a drop-in tub! It's actually your standard average joe tub. We couldn't find one that fit our exact dimensions (again, because our house is reeeaaally old), so we just bought a standard tub. Then Mr. Gracious built a wall around it and tiled it, and now it looks like a luxurious spa drop-in tub. Pretty cool, right?
So what do you think of our bathroom remodel? Pretty big changes, right?!
Did you like our bathroom remodel? Find more bathroom and home ideas on my Bathroom, Organization, and For the Home boards on Pinterest!
If you liked our Bathroom Remodel Reveal, you might also like:
How to Frugally Fill Nail Holes
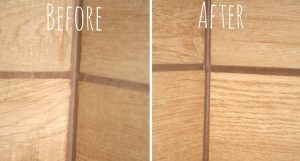
How to Make Perfectly Straight Caulk Lines
House Cleaning Tips for Busy Moms
See All Ideas and Projects For the Home
Never Miss a Thing!
Join our newsletter to get new recipes, tips, tricks, and tutorials every week!


Life Breath Present says
This is a nice bathroom update! I like the changes....I wish we had a place to put in a wall cabinet/shelving system. The bronze finishes are really splendid, I think 🙂
ProjectPatrol says
This is really beautiful! We have plans on redoing our bathroom ourselves and the fact we only have 1 in our small house is a little daunting. Our tub is apparently not an average size and only measures 54" in length as opposed to the usual 60". So strange. I love seeing and reading about the things you did.
Michelle says
Thank you! If the plumbing hadn't exploded on us, it would have just taken one day without the toilet. My husband would remove it for an hour or so to do something like lay down the subfloor, then put it right back in. So we could have used it if we wanted to. The only times we couldn't use it were when our plumbing exploded and a day or so after we laid the floor tile.
ProjectPatrol says
Definitely good to know! Thanks
Beverly says
This is an incredible DIY transformation! Everything looks great and so well done. What a huge project to complete. ! Thanks for sharing this with Snickerdoodle Sunday.
All that's Jas says
Incredible job! Thanks for linking up with us at Thursday Favorite Things!
Lindsay @Artsy-Fartsy Mama says
The remodel looks fantastic!! Thanks so much for sharing at Artsy-Fartsy Link Party!!
krista says
Major transformation. Not a fan of the tile around the tub myself but you really made the bathroom look great.