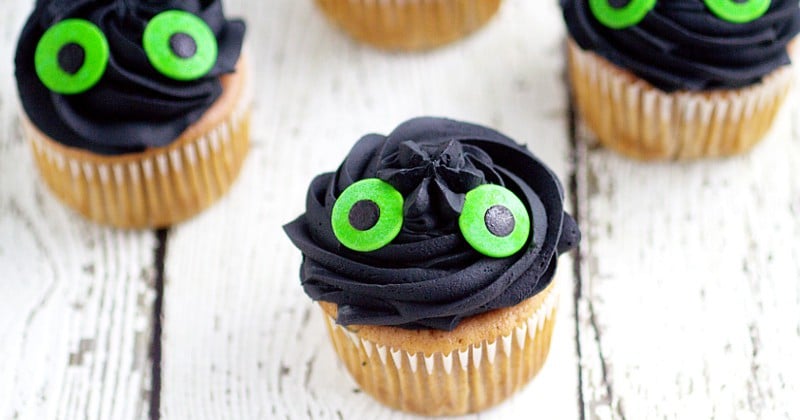
Make your little Dragon-Trainer-in-Training happy with this simple but awesome fire-breathing DIY Toothless Cake. Do it yourself with a full tutorial and supply list!
Toothless Cake
This past year our oldest turned 5, and he was heavy into dragons at the time, still is in fact. He loves the How to Train Your Dragon movies, shows, toys. Everything. So it was no surprise when he told he wanted a How to Train Your Dragon birthday party. So I prepped for his party, and you can see some of the fun How to Train Your Dragon birthday party ideas I found here. And then I just needed a cake.
I wanted to keep it simple because I still needed to make 3 more birthday cakes in the next 6 weeks (AH! Fall is actually called "Birthday season" at our house...), but I still wanted it to be fun and memorable. And voila! That's when I thought of this simple fire-breathing Toothless Cake.
Supplies to Make Your Own Toothless Cake
- Layer cake, baked, filled, and well chilled
- Double batch buttercream frosting
- 1-2 tablespoons cocoa powder
- Black Food Coloring
- Lime Green food coloring
- Cake Decorating Tips (I just have 2 sets of tips that cover pretty much all purposes- This set
has basically every little tip you can think. And I also use this larger tip set
, specifically for the 1M tip for cupcakes)
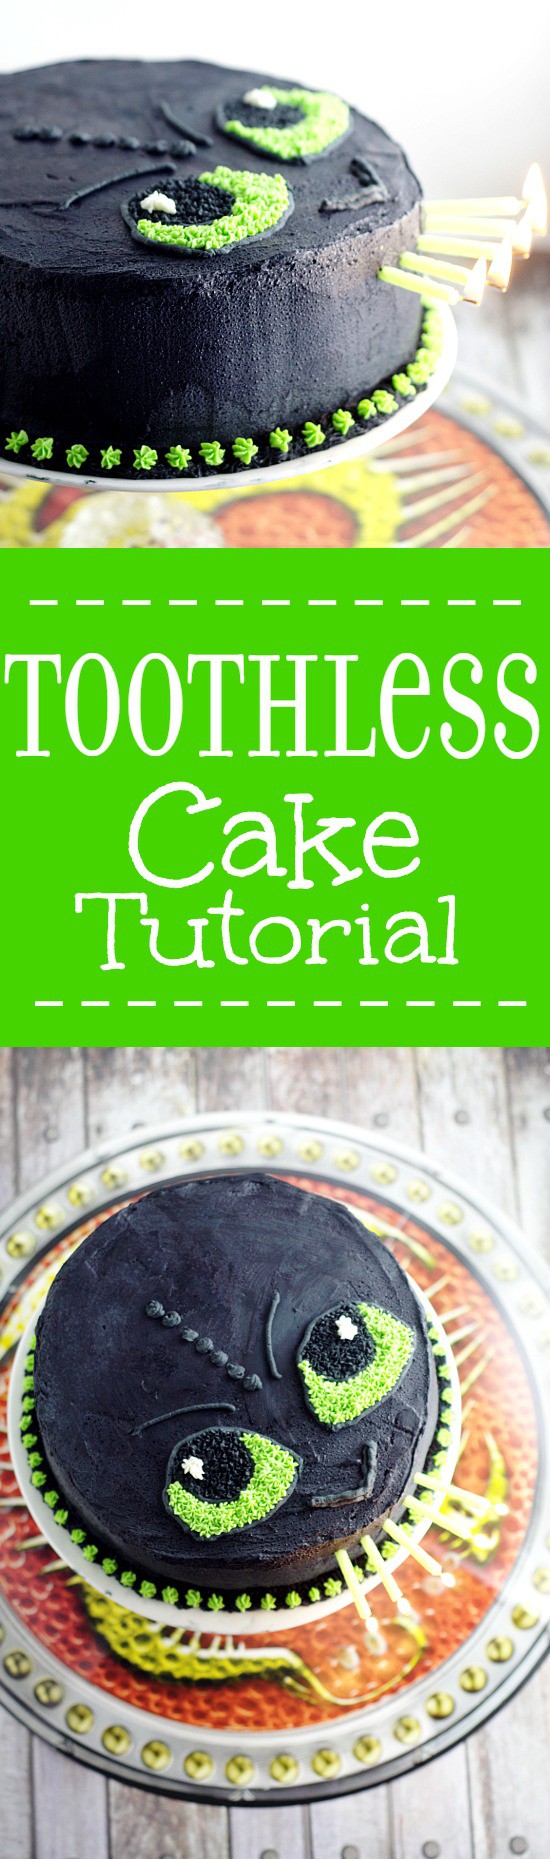
- In this tutorial, I specifically used tips: 2A, round tip 4, open star tip 16, and open star tip 21.
- 4 decorating bags (These are my favorite
)
- 3 couplers
- Candles
Toothless Cake Directions
1. Start by dirty icing or crumb coating your cake, which is basically just adding a thin layer of frosting over the cake to fill in any cracks, gaps, or holes and to keep any cake crumbs from making their way into your final, smooth design. I just use a straight spatula like this one to make it smooth. If you want to see it being done, you can check out this video. It's really very simple. When you're done crumb coating your cake, pop it back in the refrigerator to chill again for about an hour.
2. While your cake is chilling, you can prep your frosting colors for decorating. Scoop out about ¼ cup plain white buttercream and set aside. Then scoop about about 1 cup of the buttercream to dye lime green. Add your green food coloring and mix well. I also used just a touch of yellow food coloring
to make it look really neon. Set aside your green frosting. Then to the remaining frosting, add 1 tablespoon of cocoa powder and the black food coloring
and mix well. If your frosting is looking a little purple instead of black, add an additional tablespoon of cocoa powder.
3. Put a coupler on each of 3 separate bags, and a large round tip (like the Wilton 2A tip
) on the last bag. Place the white frosting, green frosting, and about 1 cup of the black frosting in the bags with couplers
. And fill the bag with the round tip with as much black frosting as you think you can handle at once; this bag is the one you will use to actually frost the cake.
4. When your cake has chilled, remove it from the refrigerator, and begin frosting it using the bag with the round tip. To frost, just pipe the frosting all the way around the cake, kind of in a spiral, so that the whole thing is covered. Then go back and smooth it out with your straight spatula. It's much easier to get a smooth cake with buttercream using this piping technique.
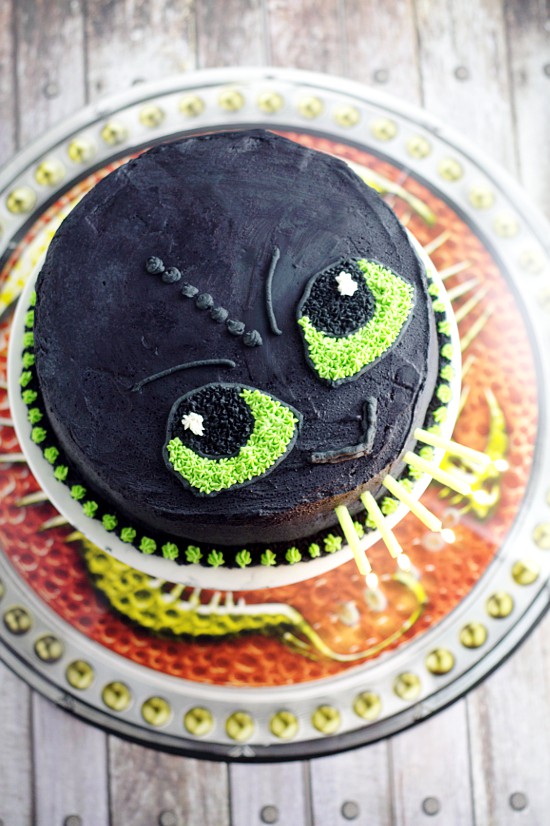
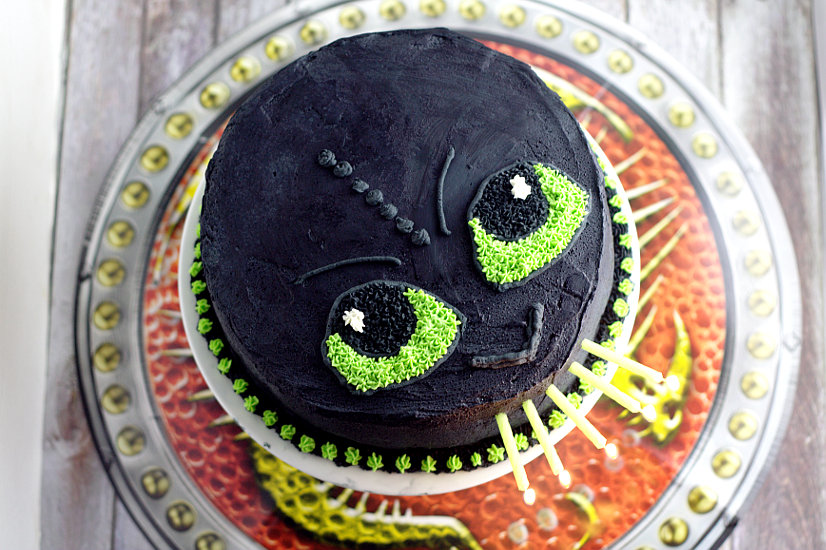
5. Put a size 4 round tip on the bag of black frosting with the coupler. Draw the eyes with the frosting, kind of in the shape of footballs, and draw semi circles in the middle for pupils Also draw the nose below the eyes, by just drawing a wide v-shape. Draw the eyebrows above the eyes, and some dots between them for some scale ridges. I like to sketch on paper so that I can get the feel before doing the frosting. But the great news is, since it's black on black frosting, it will "erase" really easily if you need to wipe part off to start again. Set aside the black frosting when you're done.
6. Put a medium-sized star tip on the green frosting (I used a Wilton Open Star Tip 16). Fill in the outside of the eyes by piping in small stars until the area is completely covered with green.
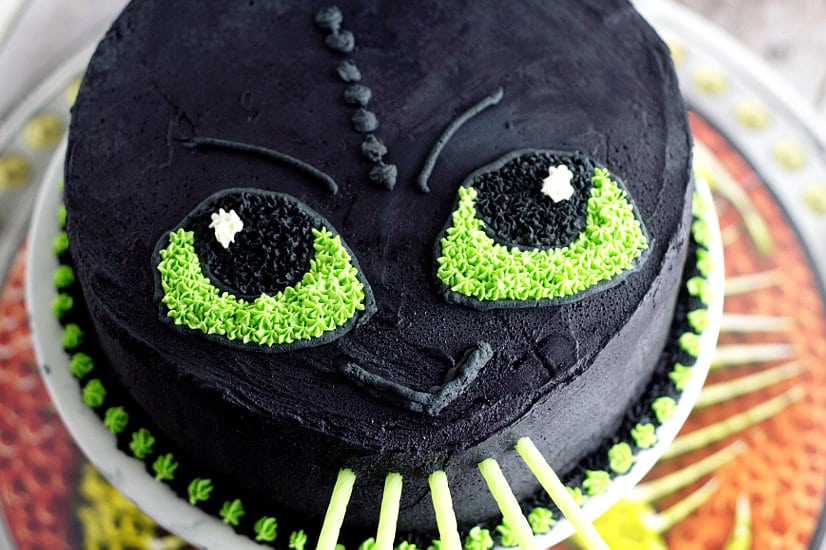
7. Take the star tip off the green frosting, rinse completely, then attach it to the bag of black frosting with the coupler. Using the same technique, fill in the middle pupil part of the eye by piping small stars with the black frosting.
8. Take the star tip off again, rinse completely, then attach it to the bag of white frosting. Make 2-3 small stars off to the side of the pupils to give them a little depth and glimmer.
9. After you're done filling in the face, you can add a simple border on the bottom. I used a Wilton Open Star 21 for the black, just making large dots all the way around. And then the Wilton Open Star Tip 16
for the green in between.
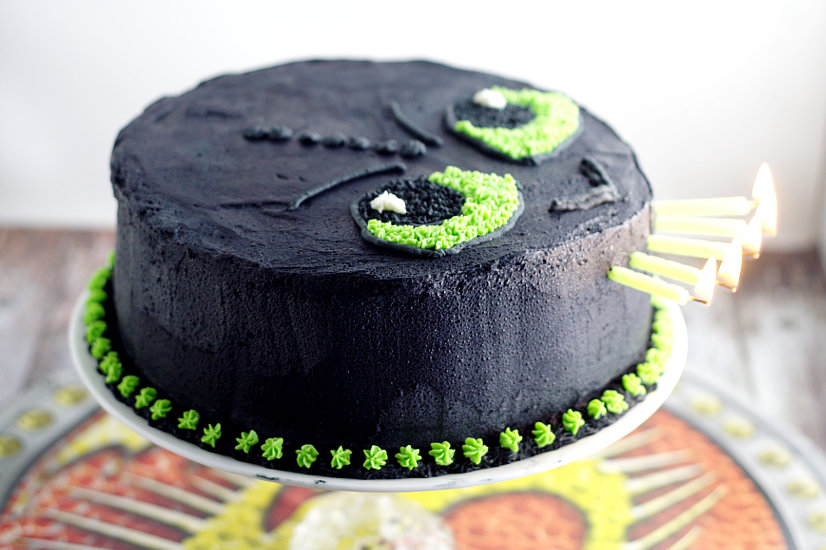
10. Don't forget the candles for the awesome fire breathing part! Just add some candles where the mouth would be (we used these lime green ones) and light them up to sing happy birthday!
Did you like this Toothless Cake tutorial? Find more on my Cakes & Cupcakes, Party Cakes, and Party Ideas boards on Pinterest!
If you liked this Toothless Cake tutorial, you might also like
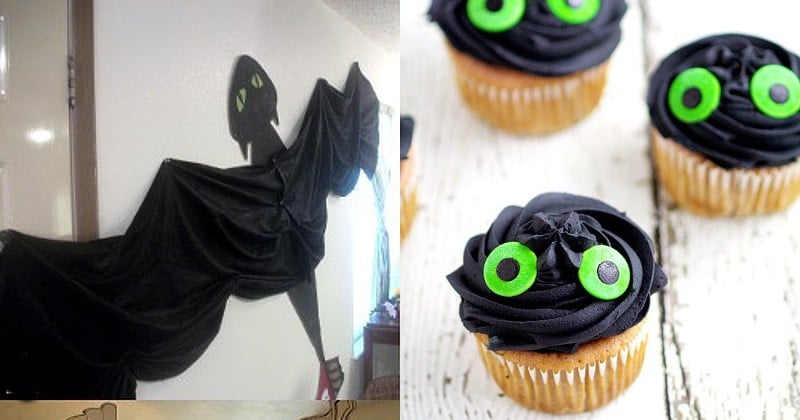
How to Train Your Dragon Birthday Party Ideas

Gift Ideas for Kids... That They'll Actually Use
Never Miss a Thing!
Join our newsletter to get new recipes, tips, tricks, and tutorials every week!

Rebeckah says
This is awesome! Thanks for sharing it.
Sofia says
Such a nice Idea Keep posting such great ideas.